
Autoencoder (1)
The Autoencoder (1)
Autoencoder is a familiar term for most people who study machine learning, in short, it is a very important unsupervised learning algorithm.
What is unsupervised learning algorithm?
In machine learning, there are three types of learning methods, supervised learning, unsupervised learning and Semi-supervised learning. Here, we just compare supervised learning and unsupervised learning. Imagine you are a student who is studying for grammar section of SAT, different from supervised learning, unsupervised learning is when you do not have answers for those questions and you have to figure out a way by yourself to find out what kind of grammar question you are doing, like some of them are testing the tense, some are testing the pronoun. With unsupervised learning, machine could just classify objects by comparing their differences and similarities.
An interesting explanation professors in Georgia Tech: Link
With an Autoencoder, data can be efficiently classified, one great representation is clustering, such as the picture below, a huge amount of data can be distributed into different areas and therefore, form different categories, in this case, the AI does not need the label anymore.
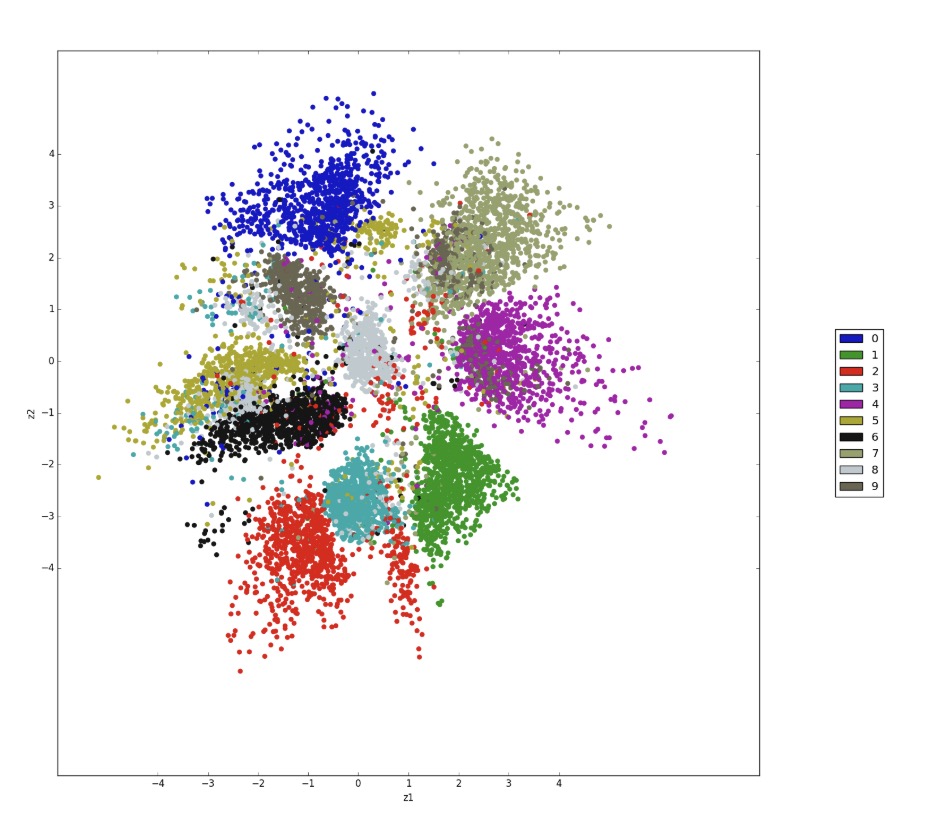
Image Source
Speaking of classifying, in an Autoencoder, when the data should gets encoded is when the features of that image or object are filtered out.
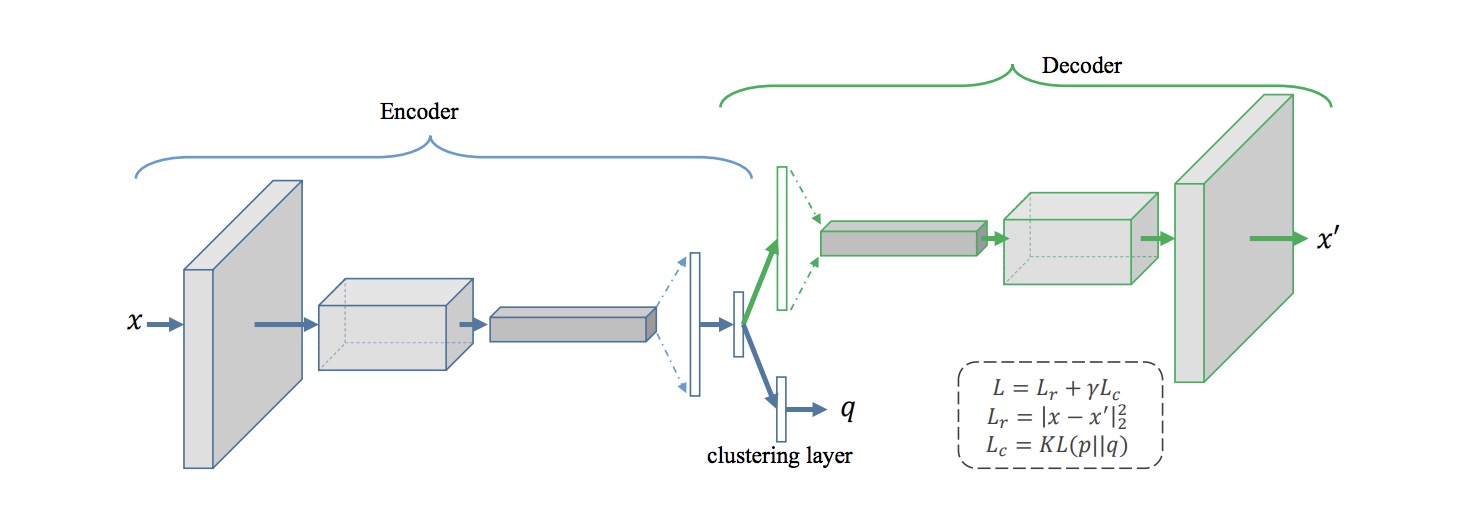
Image Source
Back to our autoencoder, what autoencoder does is just to compress a dataset into features which are are much more tiny than the original datasets, also it is able to get back to the reconstruct original dataset with those features.
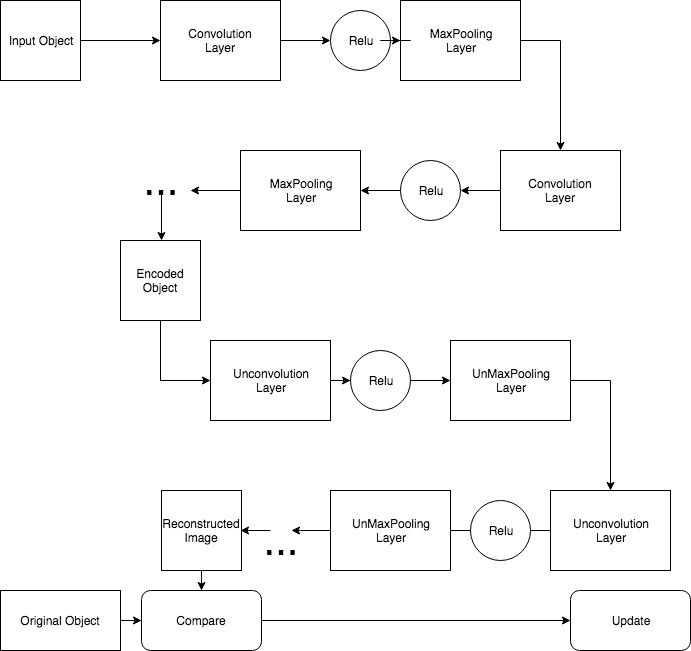
Today, I tried to implement a convolutional autoencoder with tensorflow based on the world famous cifar 10 image dataset. The autoencoder I am using is convolutional autoencoder, which incorporates Fully Connected Neural Network in Autoencoder, it encodes featuers of things primarily with convolution, maxpooling.
Tools:
Tensorflow, Pillow, Numpy
Dataset:
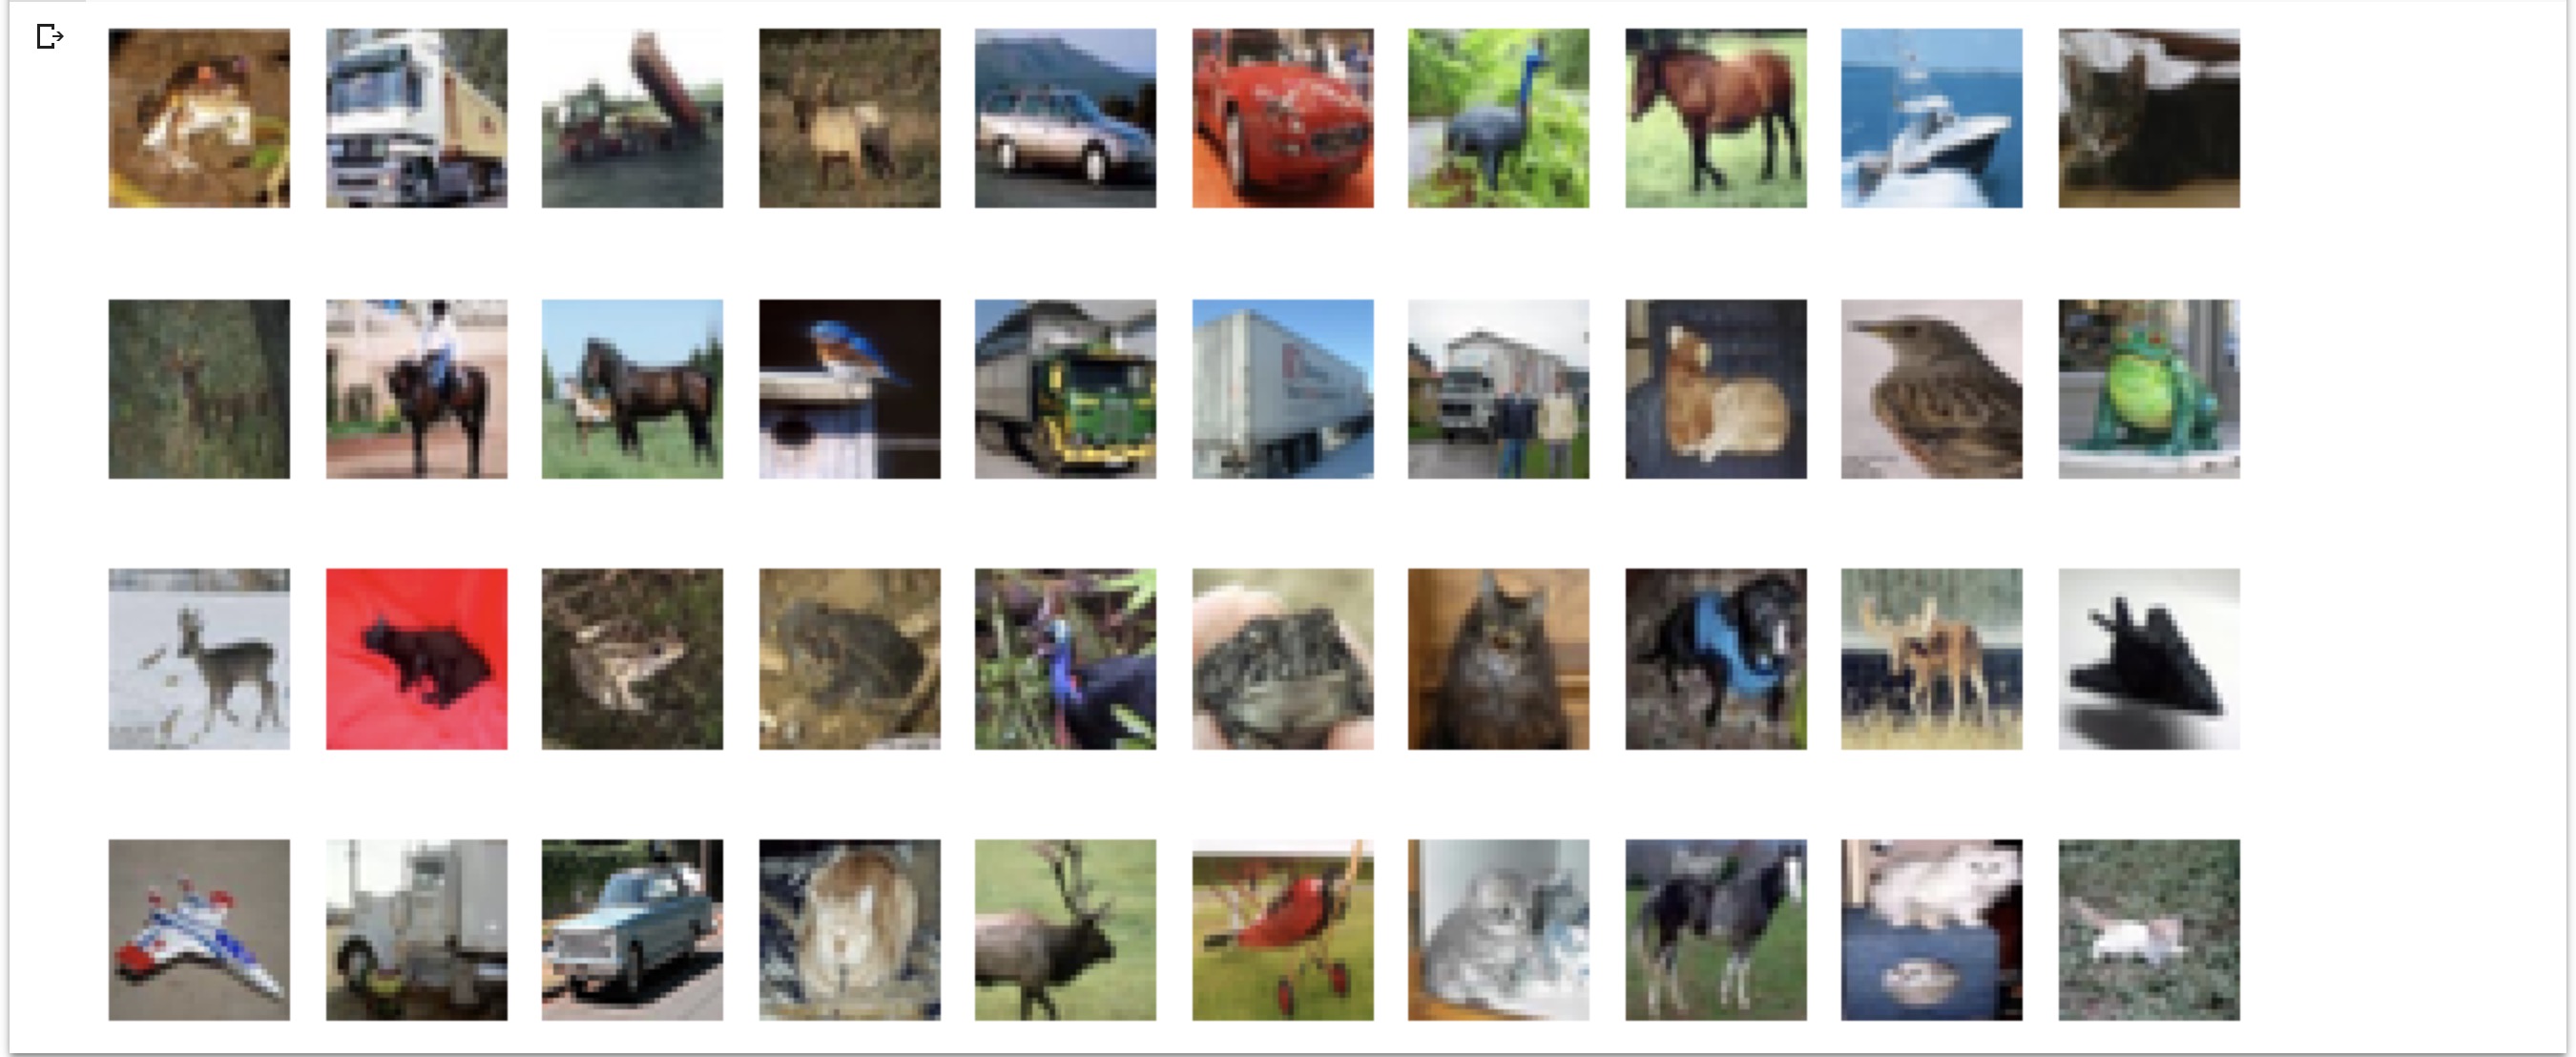
Firstly, we start with showing the original images from cifar-10:
def showOrigDec(orig, dec, num=20, per_row = 5, num_row = 4):
    n = num
    plt.figure(figsize=(20, 10))

    for i in range(n):
        # display original
        ax = plt.subplot(num_row, per_row, i+1)
        plt.imshow(orig[i].reshape(32, 32, 3))
        ax.get_xaxis().set_visible(False)
        ax.get_yaxis().set_visible(False)
    plt.show()
showOrigDec(X_train, None, num=40, per_row = 10, num_row = 4);
Then, we start constructing the autoencoder, below is a convolutional autoencoder with maxpooling, the encoded picture would be size of 8*8,then it is decoded back to 32*32.
def autoencoder(inputs):
    img = lays.conv2d(inputs, 32, (6, 6), stride=2, padding='VALID',activation_fn=tf.nn.relu)
    img = lays.max_pool2d(img, (2, 2),1, padding = 'SAME')
    img = lays.conv2d(img, 32, (3, 3), stride=1, padding='VALID',activation_fn=tf.nn.relu)
    img = lays.max_pool2d(img, (2, 2),1, padding = 'SAME')
    img_encoded = lays.conv2d(img, 3,  (3, 3), stride=1, padding='VALID',activation_fn=tf.nn.relu)

    encoded = lays.conv2d(img, 16,  (3, 3), stride=1, padding='VALID',activation_fn=tf.nn.relu)
    img = lays.conv2d_transpose(encoded, 16, (3, 3), stride=1, padding='VALID',activation_fn=tf.nn.relu)
    img = lays.conv2d_transpose(img, 32, (3, 3), stride=1, padding='VALID',activation_fn=tf.nn.relu)
    img = lays.conv2d_transpose(img, 64, (6, 6), stride=2, padding='VALID',activation_fn=tf.nn.relu)
    img = lays.conv2d_transpose(img, 3, (3, 3), stride=1, padding='SAME')
    img = lays.batch_norm(img,activation_fn=tf.nn.sigmoid)
    print("decoded",img.shape)

    return img
Firstly, we check the output and loss on a single image, the loss = (claculate the mean square error of differenc between)
single_input = tf.placeholder(tf.float32, (None, 32, 32, 3))
single_output = autoencoder(single_input)
single_loss = tf.reduce_mean(tf.square(single_output - single_input))

single_image = X_train[3]
single_image = single_image.reshape(1,32,32,3)
with tf.Session() as sess:
  sess.run(tf.global_variables_initializer())
  with tf.device("/gpu:0"):
    sess.run(tf.global_variables_initializer())
    out,loss = sess.run([single_output,single_loss], {single_input: single_image})
Let's print out the loss, reconstructed image and the original image:
print(out.shape)
print("loss", loss)

plt.figure(figsize=(10,20))

plt.subplot(1,3,1)
plt.imshow(single_image.reshape(32, 32, 3))
plt.axis('off')

plt.subplot(1,3,2)
plt.imshow(out.reshape(32, 32, 3))
plt.axis('off')
The output:
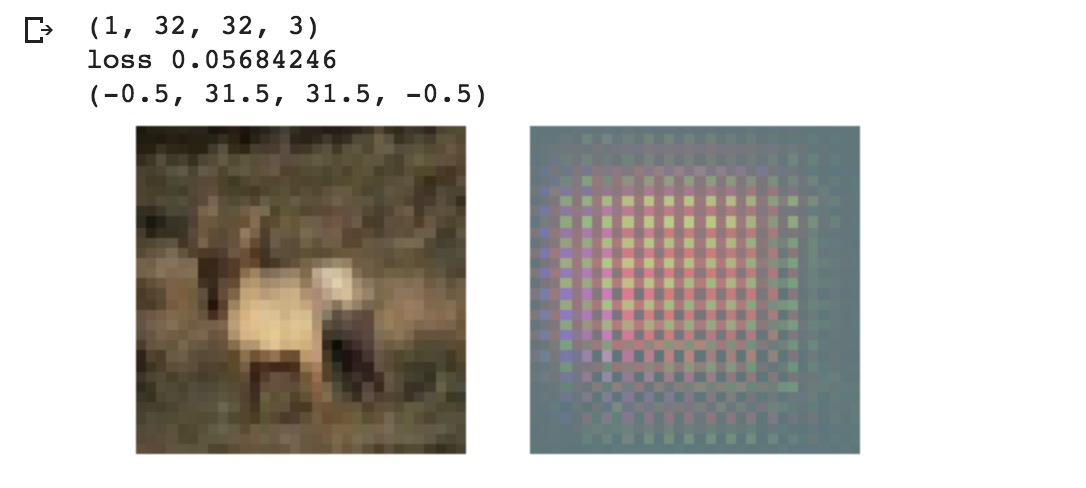
We can see it is very obvious that the reconstructed image for a single try doesn't really give us anything, if watching closely, we can somehow observe a rough shape of the object in the original image. Next, let's start training... Here I used Adam as the optimization method and 0.001 as learning rate, each batch is size of 500.
with tf.Session() as sess:
with tf.device("/gpu:0"):
sess.run(init)
data = []
for ep in range(epoch_num): # epochs loop
for batch_n in range(batch_per_ep): # batches loop
batch_img = image_data[batch_n*batch_size:(batch_n+1)*batch_size] # read a batch
output,c,_ = sess.run([ae_outputs,loss,train_op], feed_dict={ae_inputs: batch_img})
data.append(c)
if(ep+1)%2 == 0 or ep == 0:
print('Epoch: {} - cost= {:.5f}'.format((ep + 1), c))
showOrigDec(output,None, 15,15,1)
showOrigDec(batch_img,None, 15,15,1)
plt.axis('off')
plt.show()
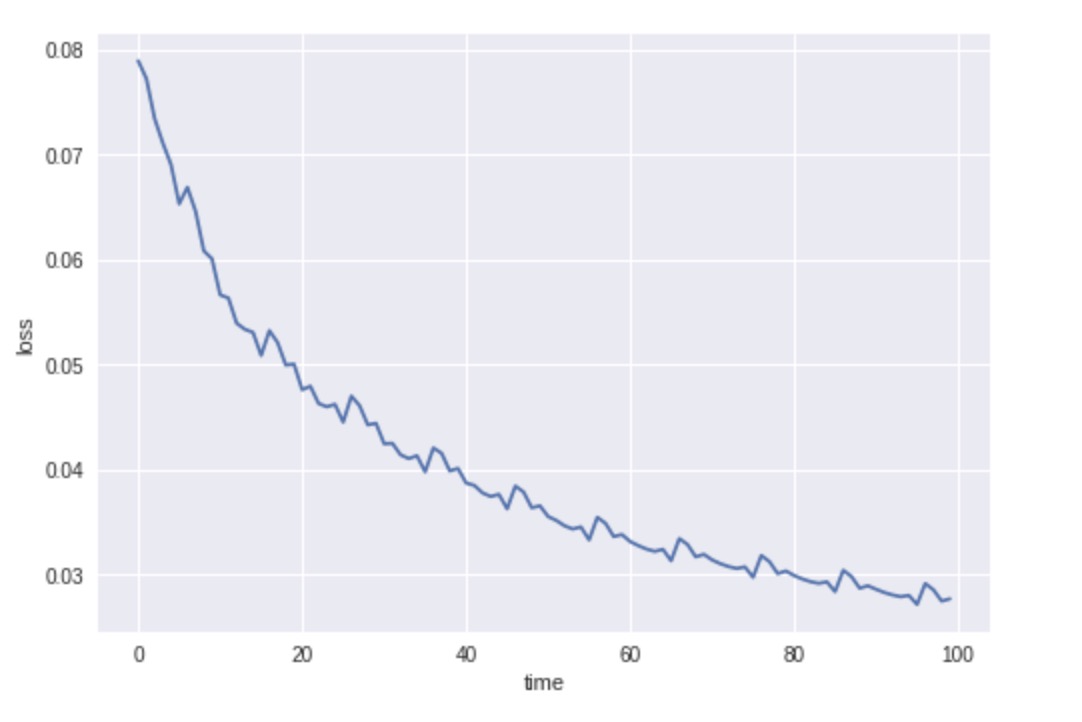
plt.plot(data)
plt.xlabel('time')
plt.ylabel('loss')
plt.show()
I chose some specific epoch to print out:


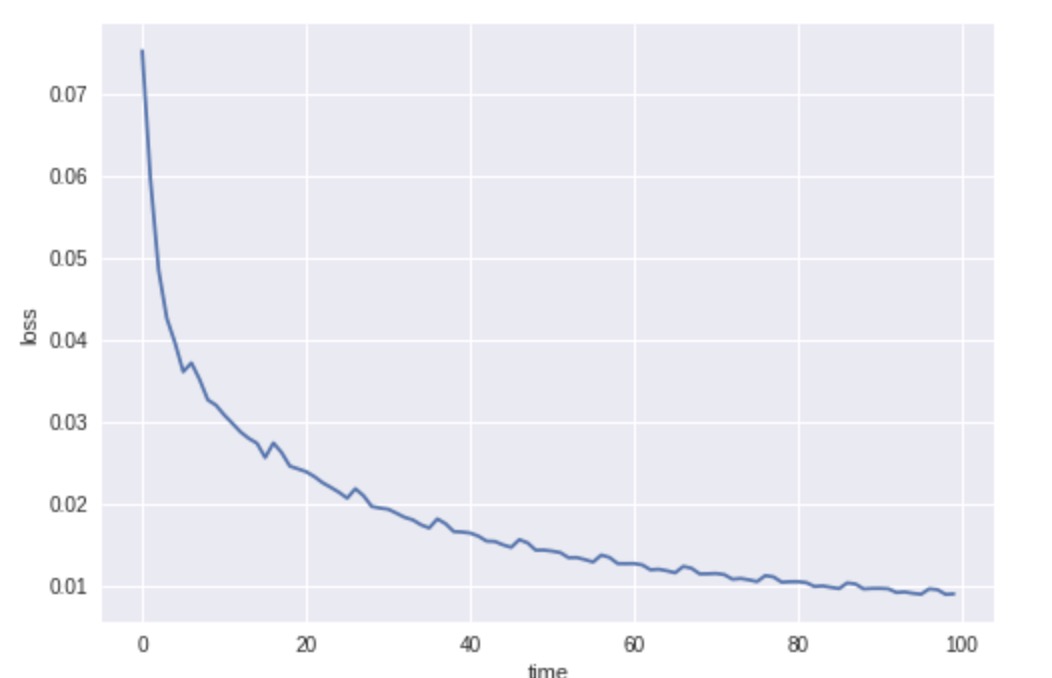
When the learning rate is 0.01

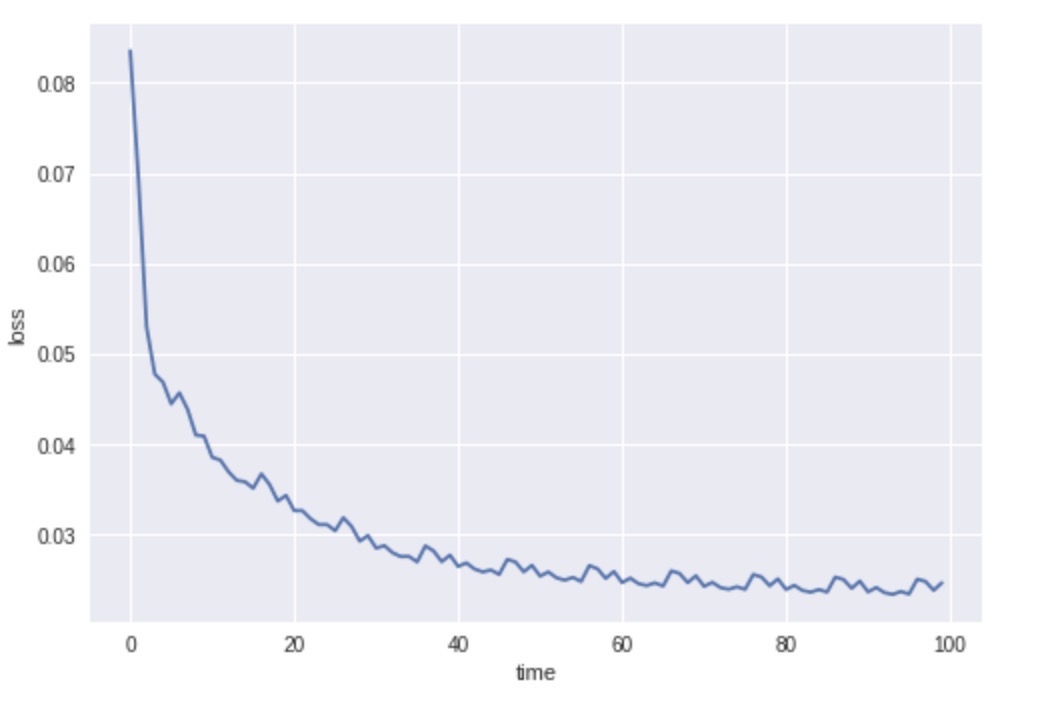
When the learning rate is 0.0001

Loss graph of these tree rates:
Suggested Reading:
Papers: A Deep Convolutional Auto-Encoder with Pooling - Unpooling Layers in CaffeDeep Clustering with Convolutional Autoencoders
Blog: Convolutional Autoencoders